Step by step instructions for submitting VRED jobs with Qube!
Install the Qube! Submission Menu
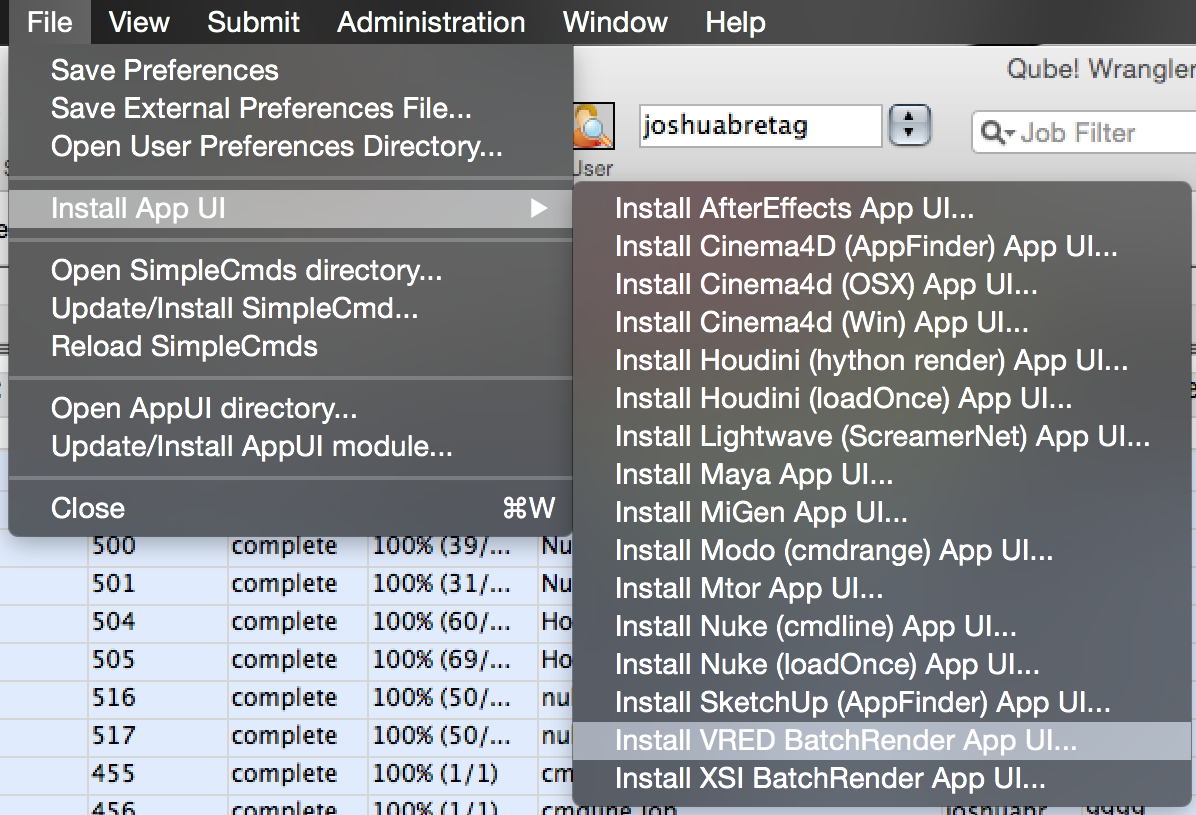
Open WranglerView on the machine you are going to submit from, and install the submission UI by locating it in the File > Install App UI > Install VRED Batchrender App UI.. line, as shown here.
The VRED Jobtype comes with the standard install of Qube! and does not require a specific jobtype to be installed.
Open the Submission Menu
Once installed you should be able to locate the "Qube!" menu in VRED.
REQUIRE SCREENSHOT
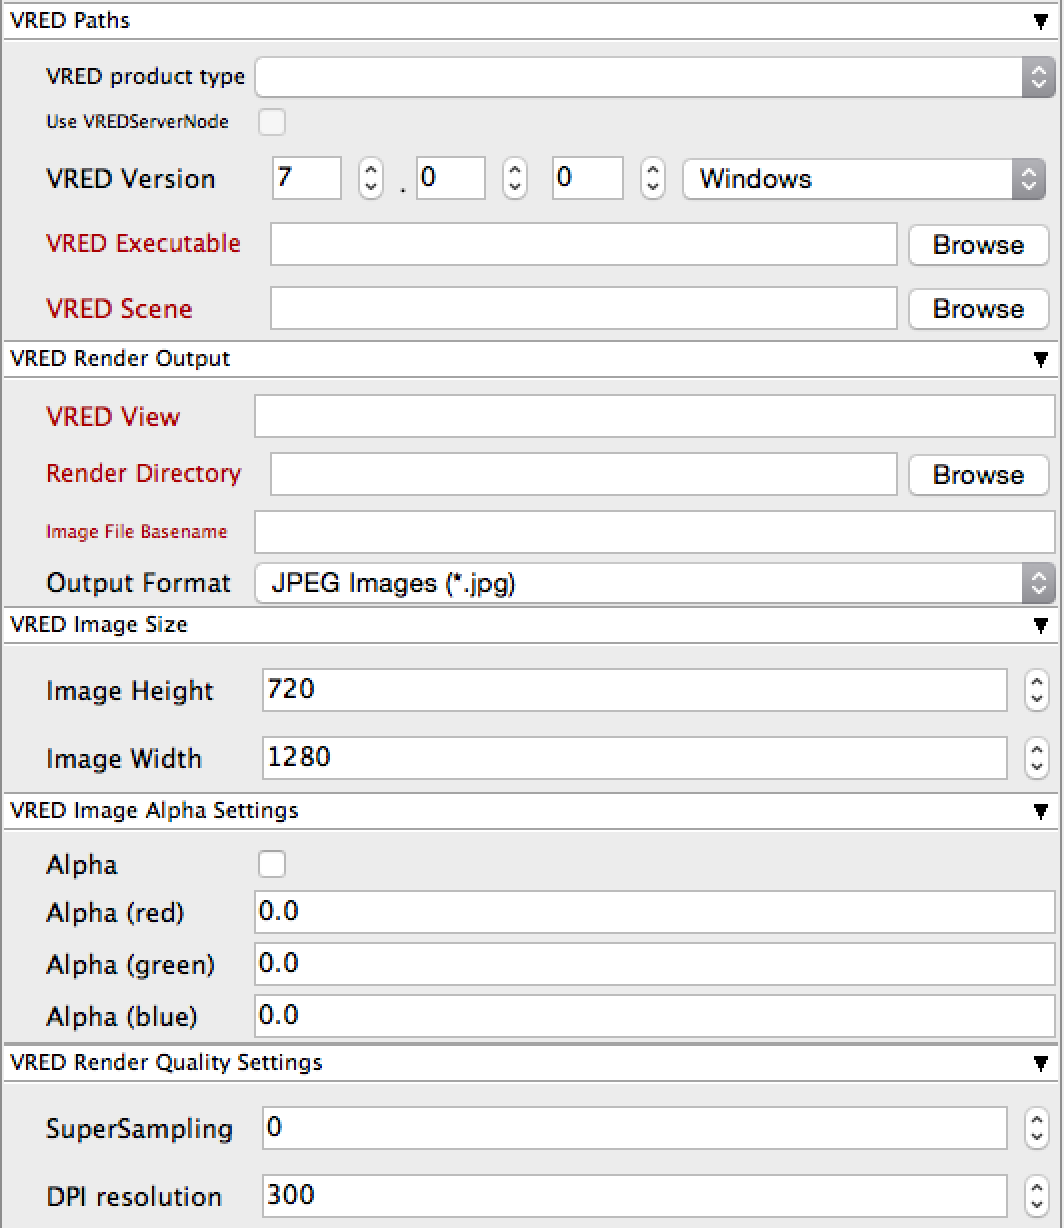
This will present a pre filled submission UI. Ensure sections marked in red have the correct details.

Click "Submit".
For further details on the submission UI see below.

Job Submission Details
Parameters Specific to VRED
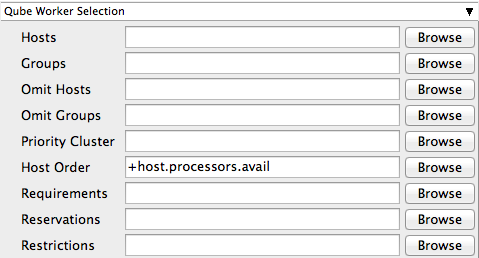
Hosts
Explicit list of Worker hostnames that will be allowed to run the job (comma-separated).
Groups
Explicit list of Worker groups that will be allowed to run the job (comma-separated). Groups identify machines through some attribute they have, eg, a GPU, an amount of memory, a license to run a particular application, etc. Jobs cannot migrate from one group to another. See worker_groups.
Omit Hosts
Explicit list of Worker hostnames that are not allowed run the job (comma-separated).
Omit Groups
Explicit list of Worker groups that are not allowed to run the job (comma-separated).
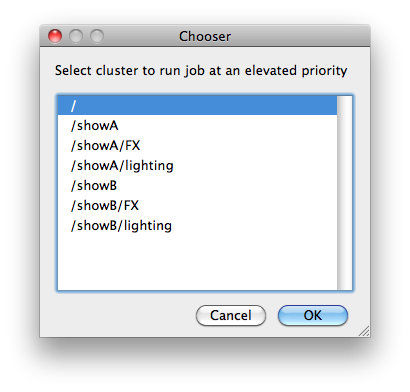
Priority Cluster
Clusters are non-overlapping sets of machines. Your job will run at the given priority in the given cluster. If that cluster is full, the job can run in a different cluster, but at lower priority. Clustering
 |
|---|
Example:
|
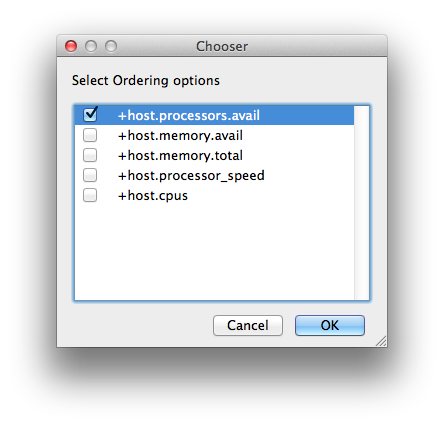
Host Order
Order to select Workers for running the job (comma-separated) [+ means ascending, - means descending].
 |
|---|
Host Order is a way of telling the job how to select/order workers
|
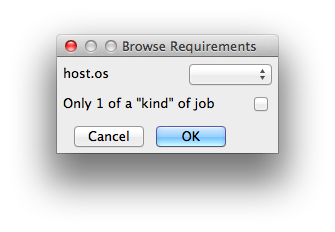
Requirements
Worker properties needed to be met for job to run on that Worker (comma-separated, expression-based). Click 'Browse' to choose from a list of Host Order Options.
 |
|---|
Requirements is a way to tell the workers that this job needs specific properties to be present in order to run. The drop-down menu allows a choice of OS:
You can also add any other Worker properties via plain text. Some examples:
With integer values, you can use any numerical relationships, e.g. =, <, >, <=, >=. This won't work for string values or floating point values. Multiple requirements can also be combined with AND and OR (the symbols && and || will also work). The 'Only 1 of a "kind" of job' checkbox will restrict a Worker to running only one instance with a matching "kind" field (see below). The prime example is After Effects, which will only allow a single instance of AE on a machine. Using this checkbox and the "Kind" field, you can restrict a Worker to only one running copy of After Effects, while still leaving the Worker's other slots available for other "kinds" of jobs. |
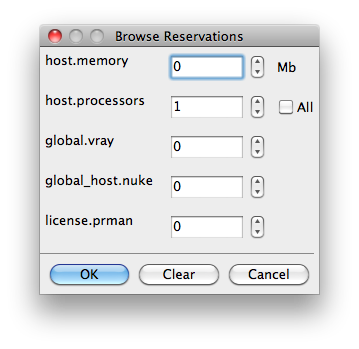
Reservations
Worker resources to reserve when running job (comma-separated, expression-based).
  |
|---|
Reservations is a way to tell the workers that this job will reserve the specific resources for this job. Menu items:
Other options:
|
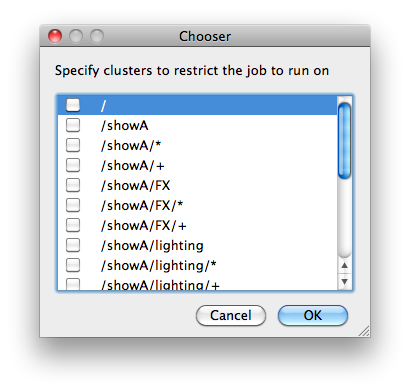
Restrictions
Restrict job to run only on specified clusters ("||"-separated) [+ means all below, * means at that level]. Click 'Browse' to choose from a list of Restrictions Options.
 |
|---|
Restrictions is a way to tell the workers that this job can only run on specific clusters. You can choose more than one cluster in the list. Examples:
|
See Also

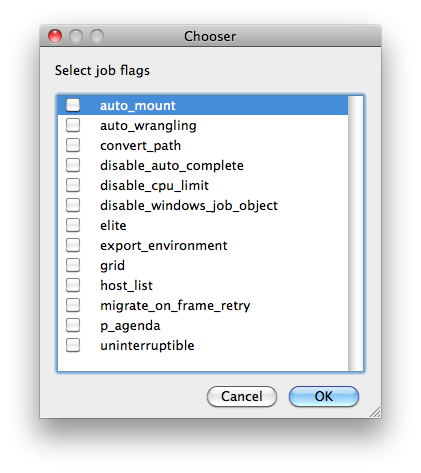
Flags
List of submission flag strings (comma separated). Click 'Browse' to choose required job flags.
|
|---|
| See this page for a full explanation of flag meanings |
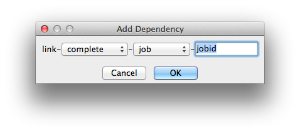
Dependency
Wait for specified jobs to complete before starting this job (comma-separated). Click 'Add' to create dependent jobs.
 |
|---|
You can link jobs to each other in several ways:
The second menu chooses between "job" (the entire set of frames) and "work" (typically a frame). So to link frame 1 of one job to frame 1 of a second, job, you would choose "work" in this menu. If you want to wait for all the frames of one job to complete before starting a second, then choose "job". The other option, "subjob", refers to the instance of a job. This is much less common, but means that, for example, the instance of Maya that was running frames has completed. For a complete description on how to define complex dependencies between jobs or frames, please refer to the Callbacks section of the Developers Guide. |
Email (job complete)
Send email on job completion (success or failure). Sends mail to the designated user.
Email (failed frames)
Sends mail to the designated user if frames fail.
Blocked
Set initial state of job to "blocked".
Stderr->Stdout
Redirect and consolidate the job stderr stream to the stdout stream. Enable this if you would like to combine your logs into one stream.
Job Label
Optional label to identify the job. Must be unique within a Job Process Group. This is most useful for submitting sets of dependent jobs, where you don't know in advance the job IDs to depend on, but you do know the labels.
Job Kind
Arbitrary typing information that can be used to identify the job. It is commonly used to make sure only one of this "kind" of job runs on a worker at the same time by setting the job's requirements to include "not (job.kind in host.duty.kind)". See How to restrict a host to only one instance of a given kind of job, but still allow other jobs
Process Group
Job Process Group for logically organizing dependent jobs. Defaults to the jobid. Combination of "label" and "Process Group" must be unique for a job. See Process group labels
Retry Frame/Instance
Number of times to retry a failed frame/job instance. The default value of -1 means don't retry.
Retry Work Delay
Number of seconds between retries.
Subjob Timeout
Kill the subjob process if running for the specified time (in seconds). Value of -1 means disabled. Use this if the acceptable instance/subjob spawn time is known.
Frame Timeout
Kill the agenda/frame if running for the specified time (in seconds). Value of -1 means disabled. Use this if you know how long frames should take, so that you can automatically kill those running long.