The Qube! UI Job Panel
The Jobs Panel allows you to view and manage lists of jobs submitted to the Qube! farm. Selecting a job in a Jobs Panel will load related data into the other panels. For example the job rendering process's output will be displayed in the Stdout Log panel and any completed frames in the Preview and Thumbnail panels.
Right-clicking on selected job(s) allows you to perform the following actions.
- Copy IDs to clipboard: Place the selected job ids in your copy/paste clipboard.
- Filter by PGRP: Display only jobs that belong to the selected job's PGRP.
- Interrupt: Stop the job immediately, and sets the status back to pending. This is typically used when a high priority job is starved for resources - manually interrupting a lower priority job will free up those resources to allow the high priority job to start. The lower priority job will start up again as soon as workers become available.
- Modify Job: Change modifiable job properties.
- Open log directory: Open the directory containing the job logs for this job. This is only relevant if you're on the worker running the job or supervisor.
- Prioritize: Change the priority of the selected job.
- Remove: Stops the job immediately (if running), and permanently removes the job from the qube database. This cannot be undone.
- Shove: Force the supervisor to reevaluate this job for dispatch. This is a good way to start a job that is stuck in the "pending" state, even though all of its requirements can be met.
- Create a zip file of the log directory: Zip the log directory and open the containing folder.
- Block (Finish Current): Stops this job after the currently rendering frame(s) complete. The job will remain in a "blocked" state until it is manually unblocked.
- Block (Purge): Stops this job immediately and sets the job state to "blocked". The job will not run again until it is manually unblocked.
- Unblock: Remove the "blocked" state from the job. All frames that have not completed will go back to a "pending" state. Those that have completed or failed will remain completed or failed.
- Kill Job: Stops this job immediately and sets the state to "killed". A job that is killed cannot be continued - it can only be retried, resubmitted, or removed.
- Preempt Job: Preempt the selected job.
- Resubmit Job: Submit a new job with the selected job's parameters. A submission dialog is opened so you can modify the job before submission.
- Retry Failed Frames: Re-render all frames marked as failed
- Retry Job: Start this job over, using the same job id. All frames will be re-rendered, regardless of whether or not they had previously completed.
- Browse Job Output Dir(s): Open a file browser for each output dir in this job.
Filtering Jobs
For large Qube! farms it can be cumbersome to scroll through tens of thousands of jobs to find that one job you're looking for so the Jobs panels has several filter tools to cut down the number of jobs in the list. Several or all filter tools can be applied at once and work as an AND, that is, for a job to be displayed in the list it must pass all filters.
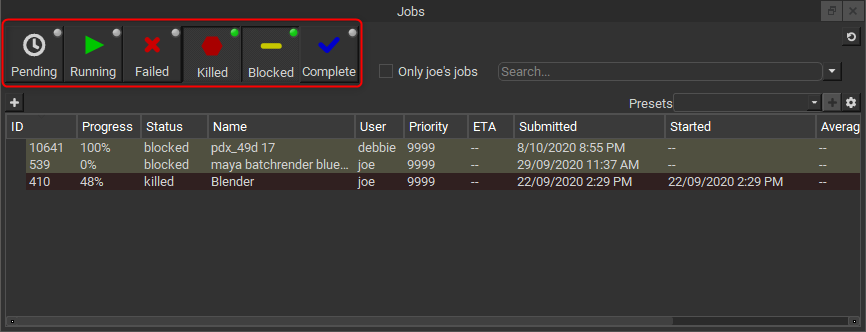
Filter by job status
The simplest but least powerful way to cut down the number of jobs in your job list is to use the status toggles. If a status toggle button has a green light lit in the upper right corner it means that the job list will display jobs matching that status. An exception to this is that when no lights are lit all jobs are displayed, you can think of this as no status filter is applied. Selecting multiple status filters acts as an OR, for example selecting both Pending and Running shows jobs that are Pending OR Running.
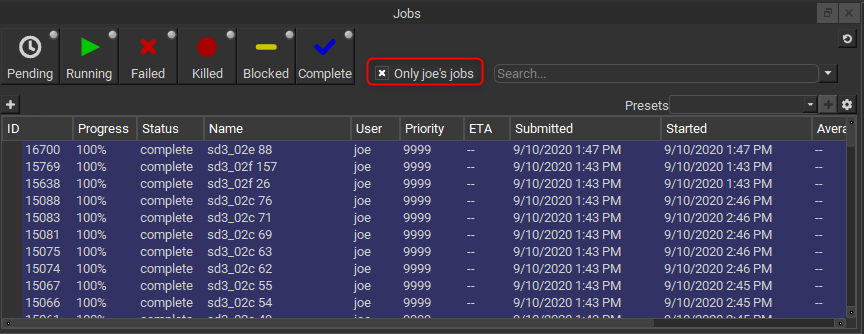
Filter by current user
Checking on the 'Only YOUR_USERNAME's jobs' checkbox will show only your jobs and is a great way to cut down the number of jobs in the list.
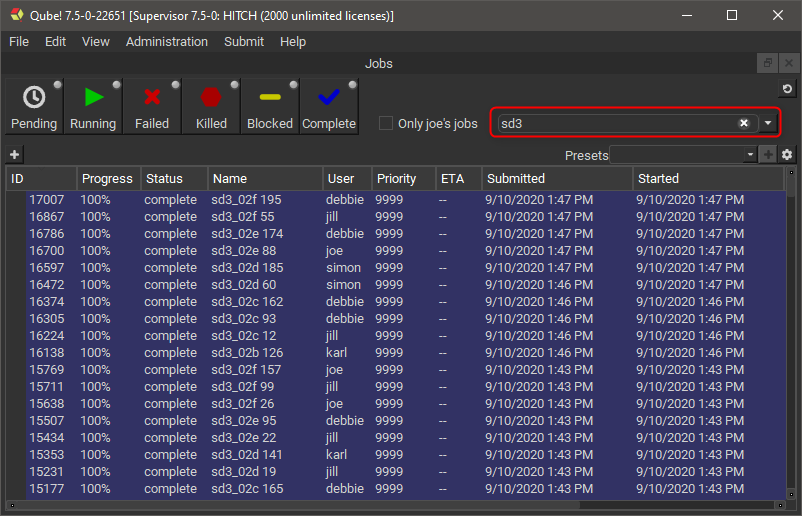
Filter by text
The most powerful way to cut down the size of you job list is to use the text based filter field. To filter on any job data visible in the list just start typing...
You can several text filters by separating them by commas (',').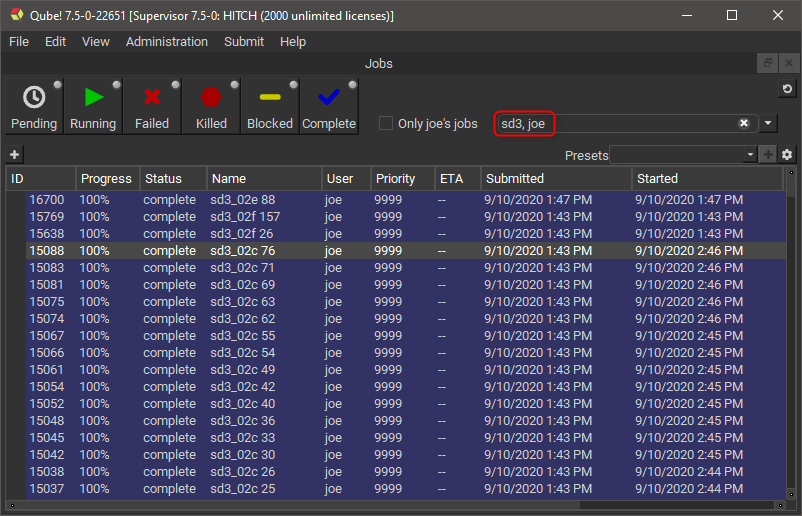
If you want to be more explicit you can specify the column to search on.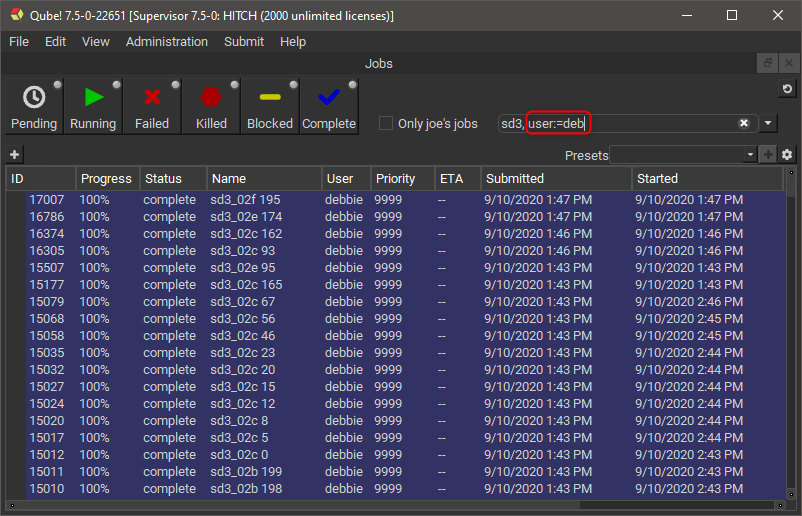
You can even use comparisons.
The comparison operators are configurable in the Filtering tab of Qube! UI's preferences in case they clash with your job data, but the defaults are:
| Comparison | Default operator |
|---|---|
| Contains | := |
| Is equal to | :== |
| Greater than | :> |
| Greater than or equal to | :>= |
| Less than | :< |
| Less than or equal to | :<= |
| Term separator | , |
Advanced filtering
If you're not one for typing out filter terms yourself you can make use of the Advanced Filter tool, this is also a good way to learn or check syntax. To open the Advanced Filter tool click on the little down arrow to the right of the filter search field.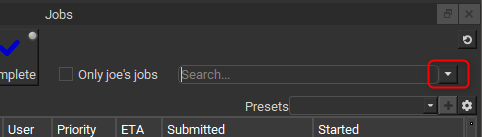
The Advanced Filter tool allows you to chain filters together graphically, here's an example.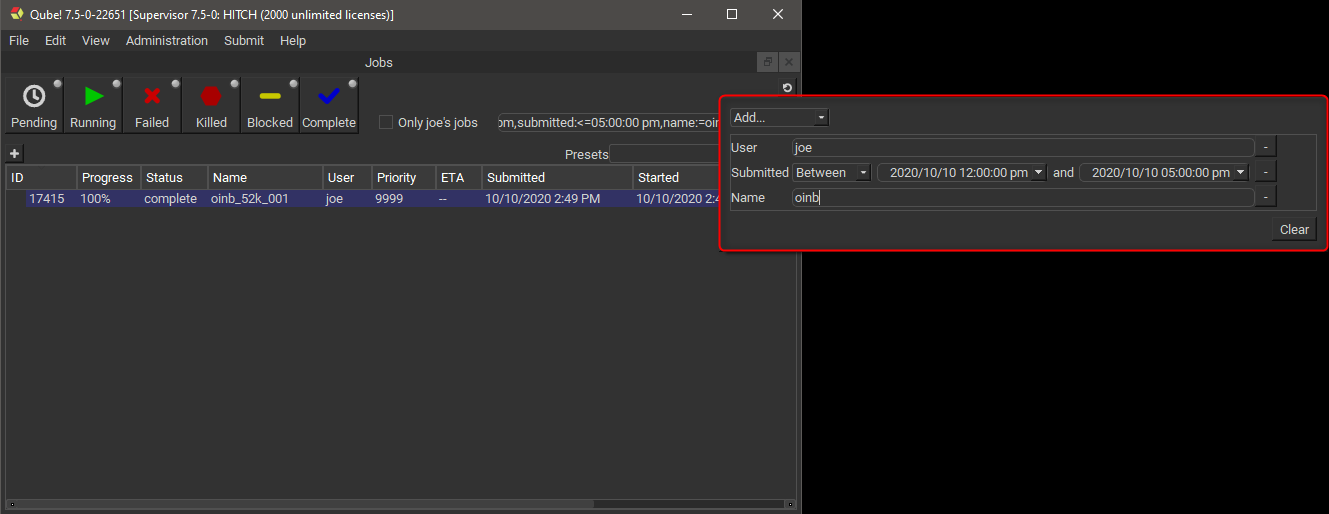
You can see that by adding filters in the Advanced Filter tool that it fills the filter search field with the specified filter terms, you can edit them there or in the tool itself. Note that altering the filter search field will clear the Advanced Filter tool, future version will allow edits in the text field to be applied to the tool.
Organizing Jobs
Job tree structuring
In addition to the several filter tools, the Qube! UI gives you a powerful way to organize your job lists. When working with files on disk it is time consuming to look through a directory that has thousands of files in it. It is common to avoid this by setting up a directory structure that organizes the files in such a way that each directory has a manageable number of files in it. Generally the deeper the directory structure the fewer files each directory has in it. A good directory structure is a balance between the depth and breadth of the files and directories contained within it. You can organize jobs in the Qube! UI in a way similar to files in a directory structure, thankfully the UI automates the placement of the jobs, you just need to tell it the structure.
To specify the job structure's levels click the little plus button under the Pending status filter toggle. A selector will appear allowing you to choose how to split up the jobs under this level, we call this a Level Function, it might sound odd now but will make sense later when we go to add our own custom ones.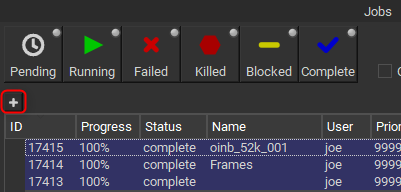
Just keep adding levels to organize the jobs in the way that makes sense to your workflow, don't worry you don't need to find the perfect hierarchy, you can make many structures (and even view them next to each other). Here's an example using the prod_show, prod_seq, prod_shot job meta fields.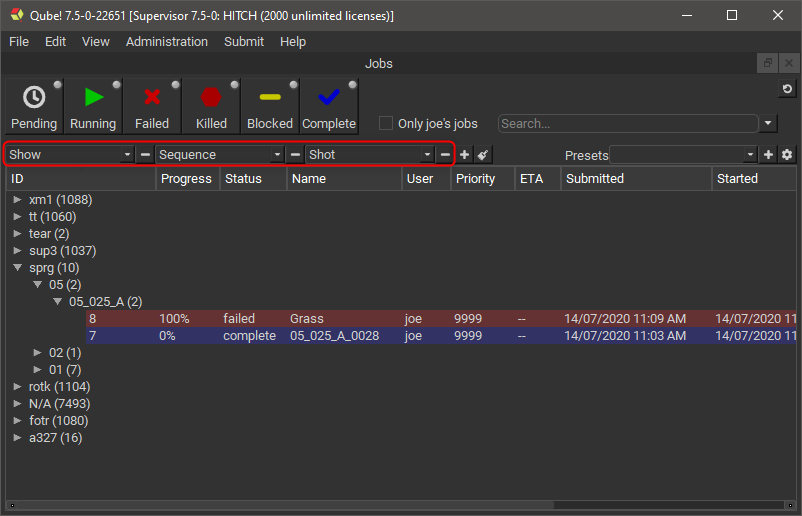
Or by status and user.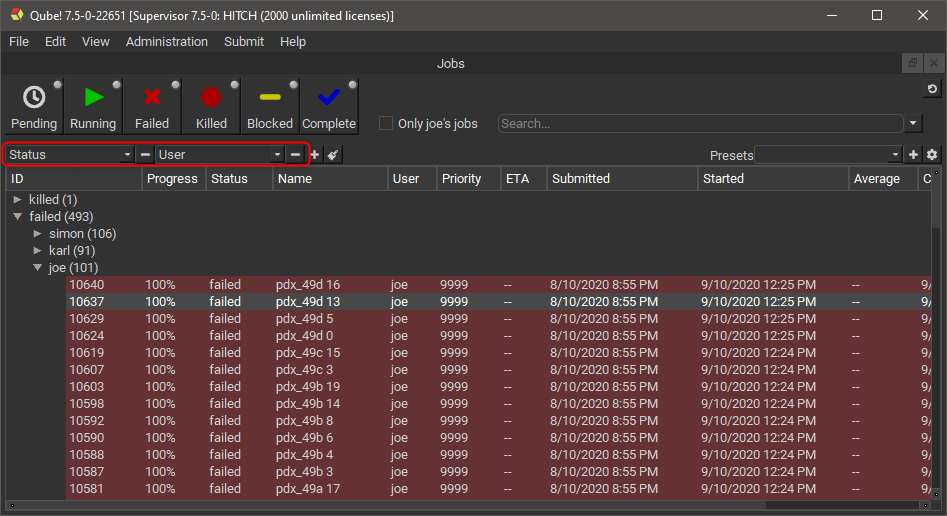
The Qube! UI's filtering and structuring work hand in hand to zero in on what you're after in quickly, so you can get back to doing your real job.
Presets
You can save your tree structures and quickly switch between them using presets, here's how.
- Create your job tree structure.
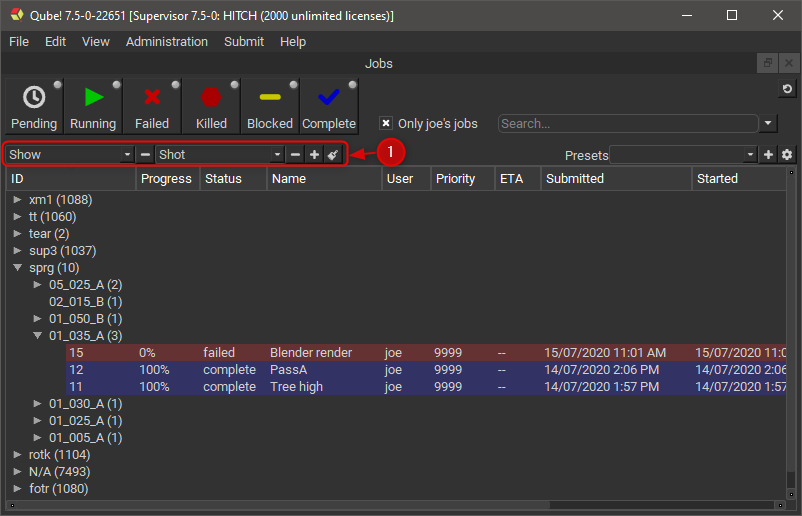
- Click the plus button next to the Presets selector.

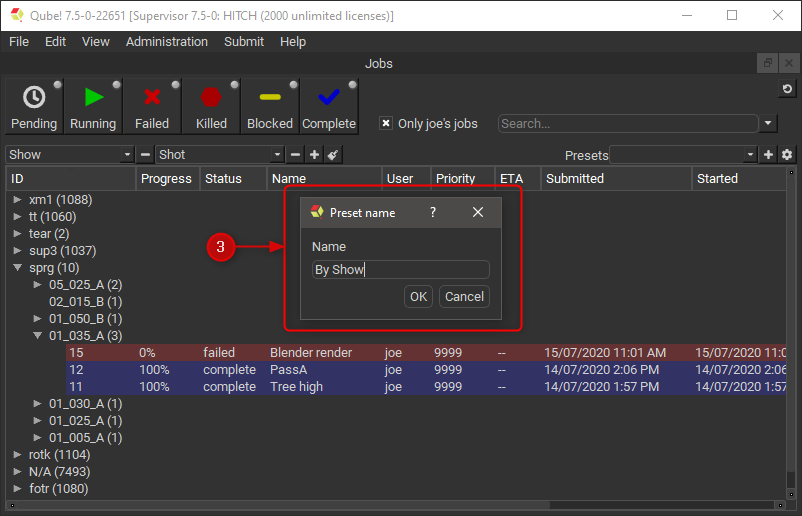
- Enter a name for the preset in the dialog that opens.
- Use the preset selector to switch between your saved presets.

Remove Presets
To remove a preset.
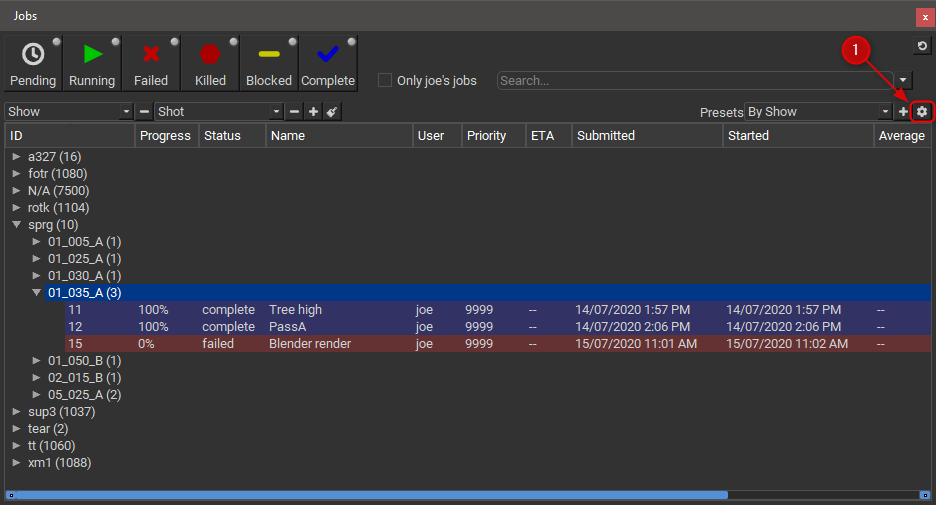
- Click on the little gear icon to the right of the Presets selector.
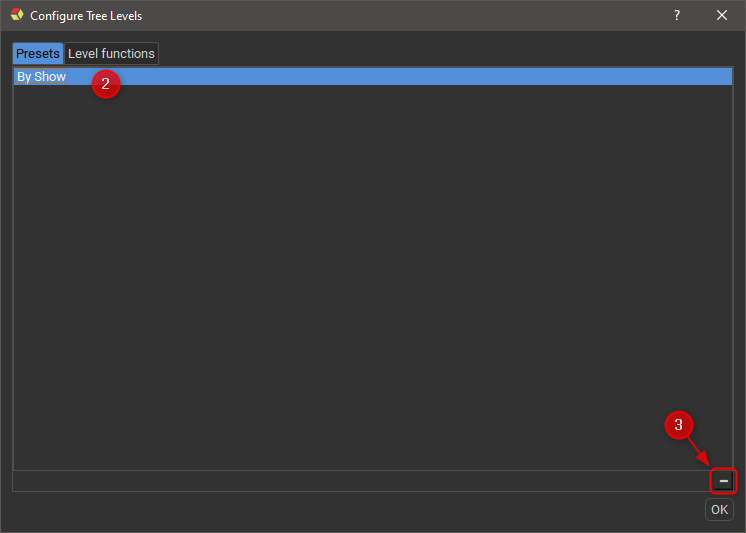
- In the dialog that appears select the preset(s) you want to remove.
- Click the '-' button.
Advanced job tree structuring
It is possible to write your own Level Functions using Python, but first some definitions so we're on the same page.
Level Function
Level Functions define the job tree structure. As a typical tree structure, a Level Function may have a parent and/or children. Each Level Function is given jobs that match its parent and in turn hand down jobs that match itself to its children. If there is no parent, that is the Level Function is the root of the structure, then it processes all jobs. If there is no child Level Function then all jobs that match the Level Function become its children.
The function of a Level Function sorts jobs into different groups. The function runs on a per job basis (so be aware of performance issues) it is passed a single job at a time and returns the name of the group(s) it belongs to. By returning a list or tuple of strings a single job can appear in several groups. Group names are not set or stored anywhere, they are generated by the Level Functions themselves.
There are many built-in Level Functions, but you can also make your own custom levels using Python.
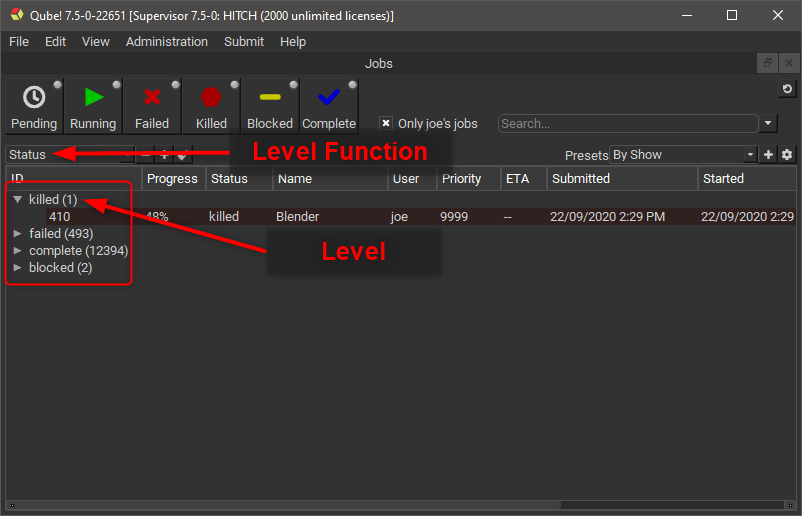
Level
A Level is what the Qube! UI calls the 'groups' referred to in the above Level Function definition.
Level name
A Level name is the text that is displayed in the tree structure at the Levels (branches of the tree). Level names are generated by the Level Function.
The Level Functions used within a particular structure act like ANDs, that is, for a job to be a leaf under a series of Level Functions it has to match all of them.
Creating a custom Level Function
As mentioned above, you can create your own custom Level Functions using Python.
- Click on the gear icon to the right of the Presets selector.

- In the dialog that appears select the "Level functions" tab.
- Add a new Level Function using the plus button a the bottom of the Level Function list.
- Double click on the new level function and give it a name, for this example call it "Submit Type".
- You will notice that in the code editor on the right a basic example of a Level Function is automatically filled.

- The Qube! UI pre-defines a variable job which you use to set another pre-defined variable level_name, you set it to either a string or list/tuple of strings.
Copy/paste the following text into the code editor.
- Close the dialog and add a Level to the job list.
- Using the Level Function selector choose your new level.
- Enjoy the fruits of your labor.

Using several Jobs Panels simultaneously
- Add a new Jobs panel by selecting the menu View->Panels->Add custom view->Jobs.

- Give the new Jobs Panel a name, for this example call it "My running jobs".
- In the new Jobs Panel turn on the "Running" filter.
- Select "Only YOUR_USERNAME's jobs".
