You are viewing an old version of this page. View the current version.

    Compare with Current View Page History

    « Previous Version 6 Next »

    Below are instructions on your first steps submitting After Effects jobs with Qube!


    Step 1 (First Time Only)

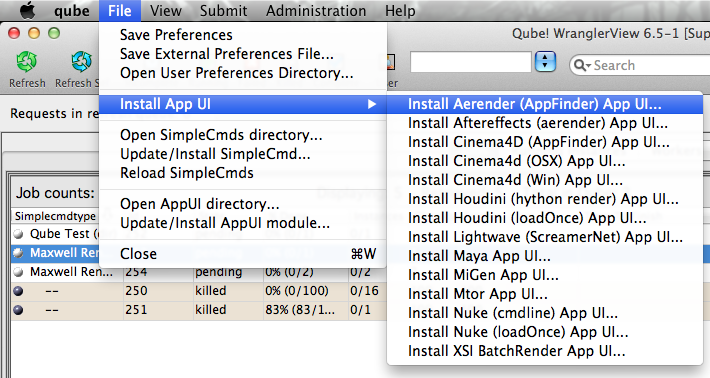
    Install a submission menu into After Effects by opening the Wrangler View UI and choosing "Install AeRender (AppFinder)" as shown here. It's preferable to choose the first AE Render entry, which will automatically find the installed location of After Effects on each Worker. However, this requires Python be installed on the Workers.

    If Python is not installed, and you don't wish to install it, choose the second entry, "Aftereffects (aerender)".

    Step 2 (First Time Only)

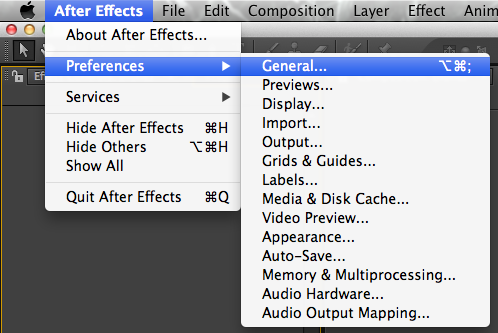
    Once installed there are a few things that need to be done before using the scrip. Run After Effects and open the General Preferences.

    Mac: After Effects > Preferences > General...
    PC: File > Preferences >General...
    Tick "Allow Scripts to Write Files and Access Network"
    Step 3 (First Time Only)

    Select "Qube_SetPath.jsx"


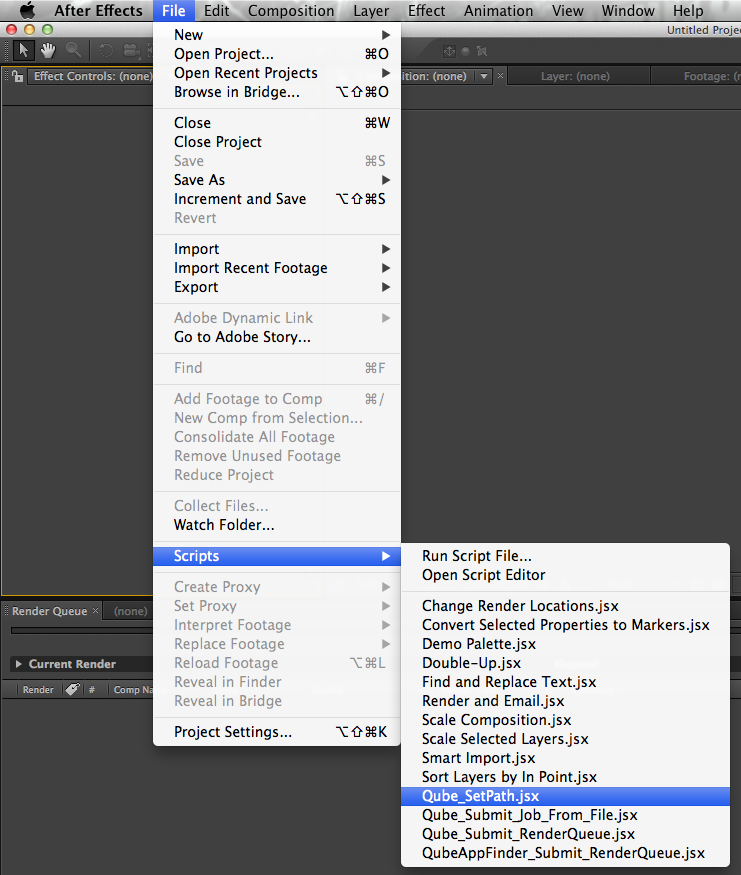
     File > Scripts > Qube_SetPath.jsx

    This will prompt you with

    Enter the correct path to the Qube application

    Mac Defaults: /Applications/pfx/qube/qube.app

    PC Defaults: C:\Program Files (x86)\pfx\qube\bin\qube.exe

    Step 4

    With a scene loaded in After effects select "QubeAppFinder_Submit_RenderQueue.jsx"

    File > Scripts > QubeAppFinder_Submit_RenderQueue.jsx


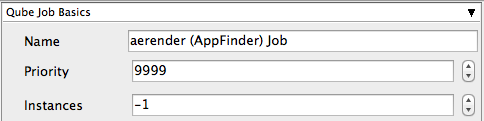
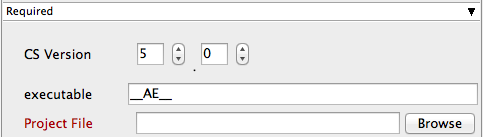
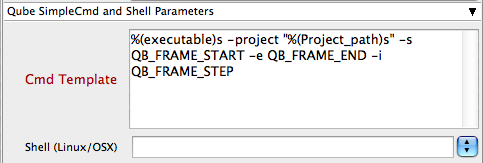
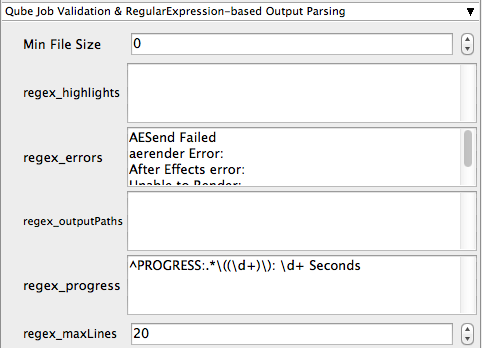
    This will present a pre filled submission UI


    Step 5

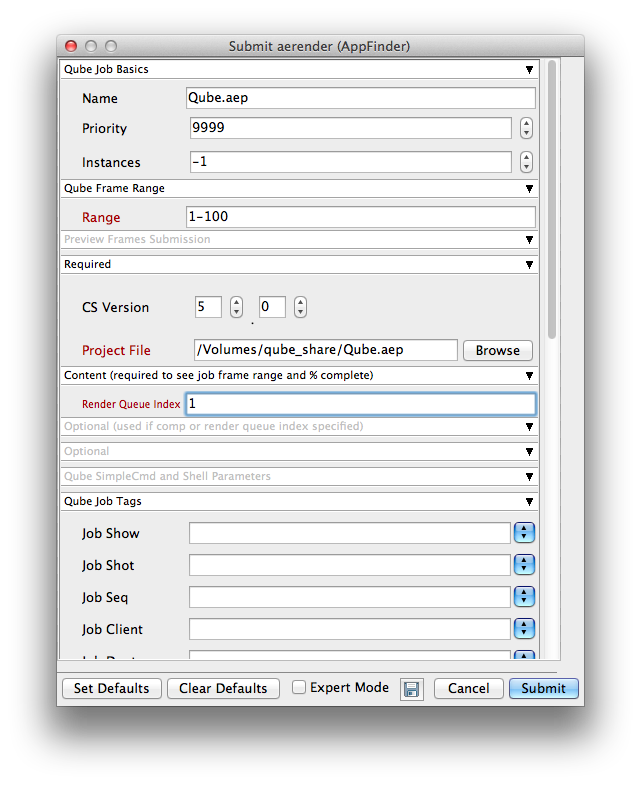
    Ensure sections marked in red have the correct details

    Click submit

    For further details on the submission UI look in the right panel

    Troubleshooting

    If you find you are getting errors here are some useful links for troubleshooting

    Troubleshooting Flowcharts 

    Below Is an expandable view of the AppFinder Jobs > "Aerender (AppFinder) Job..." Jobtype Submission UI

    Icon

    Not all sections need to be filled in in order to render only the fields marked in red are required


    Please click on the text below the section of interest


     Required

    CS Version

    Tooltip - Select version numbers to make an educated guess at where aerender is found on the remote worker.

    Icon

    Use the spinners to enter the required version of After effects

    executable

    Tooltip - Leave it set to "_AE_" to allow the job to find the right version of aerender on the worker.

    Icon

    Left default qube will automatically find the version of After Effects on the worker

    Project File

    Tooltip - Path to After Effects project (required)

    Icon

    Browse or enter manually the location of the project file to be rendered. This is a required field for submission

    Important: Best practise is to ensure the project file and all of its dependant files such as textures are on network storage accessible by the workers.

    After effects requires all plugins and fonts to be installed and licensed on every worker

     Content (required to see job frame range and % complete)

    Composition

    Tooltip - The Composition to render

    Icon

    (required if specifying frame range or other overrides listed below) If the comp is in the render queue already, and in a queueable state, then (only) the first queueable instance of that comp on the render queue will be rendered. If the comp is in the project but not in the render queue, then it will be added to the render queue and rendered. If no -comp argument is provided, aerender will render the entire render queue as is. In this case (no -comp), the only other arguments used will be -project, -log, -v, -mem_usage, and -close; the -RStemplate, -OMtemplate, -output, -s, -e, and -i arguments will be ignored.

    clear explaination needed

    Render Queue Index

    Tooltip - specifies a render queue item to be rendered. Options that make sense when rendering a single render queue item are available like with the -comp flag.

    Icon

    Enter the numeric value to override scene render queue index settings

     Optional (used if comp or render queue index specified)

    Render Settings

    Tooltip - the name of a template to apply to the render queue item.If the template does not exist it is an error. Default is to use the render template already defined for the item. Can only set if Composition option specified

    Icon

    Enter manually or select from drop-down

    Output Module

    Tooltip - name of a template to apply to the output module. If the template does not exist it is an error. Default is to use the template already defined for the output module. Can only set if Composition option specified NOTE: Distributing a render across multiple machines requires image sequence output. That is usually best set in the AfterEffects Project or the Output File Path override.

    Icon

    Enter manually or select from drop-down

    Important: when choosing the output format be aware that extensions such as .MOV or .AVI can not be distributed across the farm. Please select an image sequence based format such as .TIF etc

    Output File Path

    Tooltip - Specifying the destination render file. Default is the path already in the project file. For image sequences (the preferred method for distributed rendering) use # to denote frames. For example: /Volumes/Stuff/output/proj1/frames[####].psd. Can only set if Composition option specified.

    Icon

    Browse or manually enter the location of the output image directory you wish to generate

    Important: Best practise is to ensure outputs are written to network storage accessible by the workers

    Memory Usage

    Tooltip - (image_cache_percent max_mem_percent) where image_cache_percent specifies the maximum percent of memory used to cache already rendered images/footage, and max_mem_percent specifies the total percent of memory that can be used by After Effects.

    Icon

    Enter the numeric value to override scene memory usage settings

     Optional

    Verbosity

    Tooltip - specifies the type of messages reported

    Icon

    Choose the level of detail you would like the logs to provide

     Click here for details...

    Cmd Template
    This is used to create the command string for launching the job on the worker. It will be set differently depending on the application you are launching from.

    Shell (Linux/OSX)
    Explicitly specify the Linux/OS X shell to use when executing the command (defaults to /bin/sh).

    • No labels