The parts of Qube!
A Qube farm has 3 main components:
- The Qube! clients, machines that submit jobs. Typically these are artists or end-users workstations.
- The Qube! workers, machines that run jobs. A client can also be a worker.
- The Qube! supervisor, which controls what jobs are sent to which workers.
Installation in a nutshell:
- Install the following components on the supervisor machine first in the following order:
- Qube core
- Qube supervisor
- On Windows
- ActiveState Python version; 2.5, 2.6 or 2.7
- ActiveState Perl version; 5.10 or 5.14
- Qube! WranglerView
- Install at least one worker machine:
- Qube core
- Qube worker
- On Windows
- ActiveState Python version; 2.5, 2.6 or 2.7
- ActiveState Perl version; 5.10 or 5.14
- (optional) any DynamicAllocation jobtypes; Maya, 3dsMax, XSI, etc.
- Qube! WranglerView
- Client machines:
- Qube core
- Qube ArtistView for a simplified job management interface
- Or, Qube WranglerView (also know as the QubeGUI) for a more powerful job and worker management interface
Once Supervisor, a worker, and one client are installed:
Verify Supervisor installation
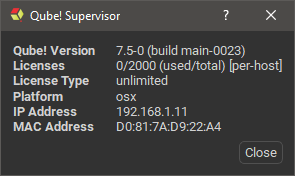
On the supervisor, start the Qube! US. It should connect to the supervisor service and show the supervisor hostname and license count in the UI title bar:

If you see 0 licenses you will need to install the licenses on the supervisor. See License Installation if you have a license key to install.
Test the supervisor connectivity
Use the Qube! UI Administration menu to test the supervisor's network connectivity from the worker machine:

It should bring up a dialog:

If you see this, your supervisor is up and running and responding to requests.
Verify Worker installation:
The simplest test possible is to submit a job that simply runs the "set" command, which does nothing but print out the operating system's environment variables. You can see what it's expected to do by opening a cmd prompt on Windows or a Terminal on OS X and simply typing set and hitting <Enter>.
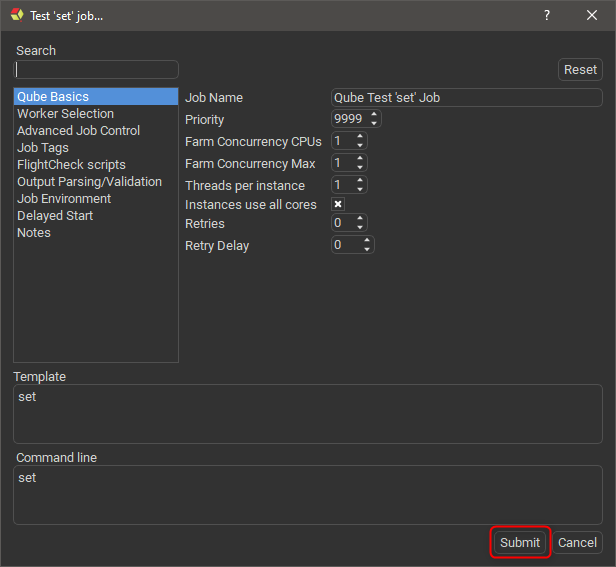
Start the Qube! UI, and select the Submit->Tests->Test 'set' job menu item.
Then, just click "Submit":
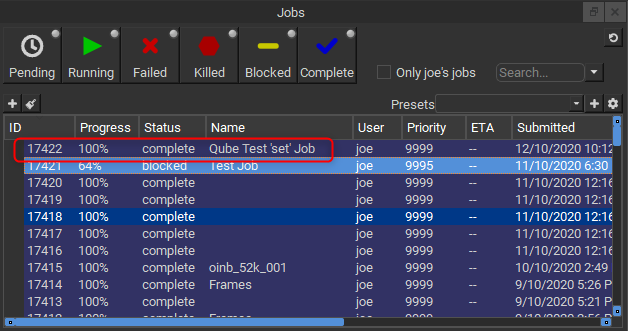
Go to the Jobs Panel in the Qube! UI, and you should see the job in the list (it will be named "Qube Test 'set' Job"). After a short period of time you should see the job in a "Complete" state.
Note that the ID of your job will be different from the screenshot above.
For further customizations please refer to the User's Guide and the Administrator's Guide.
Requirements Checklist
Please ensure the below requirements are met before continuing with this guide
- All computers with OS installed, licensed, and networked.
- Hostname resolution (DNS) working properly on all computers.
- Authentication infrastructure installed and working: NIS / YP / LDAP for linux, OpenDirectory for OSX, ActiveDirectory for Windows.
- Network filesystem reachable by Client and Worker machines. Alternatively if no authentication infrastructure is in place please ensure open read and write privileges are set.
- All applications (Maya, AfterEffects, etc) already installed on the clients and workers and licensed.
- Python and Perl are installed if using separate jobtypes http://www.activestate.com/
- All necessary Qube! installers already downloaded and on a filesystem accessible by all machines.
- If a network account is to be used for the proxy user account, this account should already have been created and granted permission to the shared file system.
- Current Qube! Supervisor license issued for the correct MAC address.
Supervisor Specifications
Below is a recommendation of minimum specifications for optimal operation of Qube! Supervisor.
< 10 workers:
- 4-core
- 4GB of ram
10 ->30 workers:
- 8-core
- 8GB RAM
30 -> 150 workers:
- 8-core
- 8GB RAM minimum, 12GB recommended
150 -> 250 workers:
- 8-core
- 12 GB RAM minimum, 12GB recommended