You are viewing an old version of this page. View the current version.

    Compare with Current View Page History

    Version 1 Next »

    Below are instructions on your first steps submitting XSI jobs with Qube!


    Step 1 (First Time Only)

    You will need to install the XSI jobtype

    Installation:

    3dsmax requires the "XSI jobtype" to be installed 

    If you are not familiar with the installation process please see  Installation Guide & Installation Layout

    You will need to select "XSI Jobtype" during the installation process 
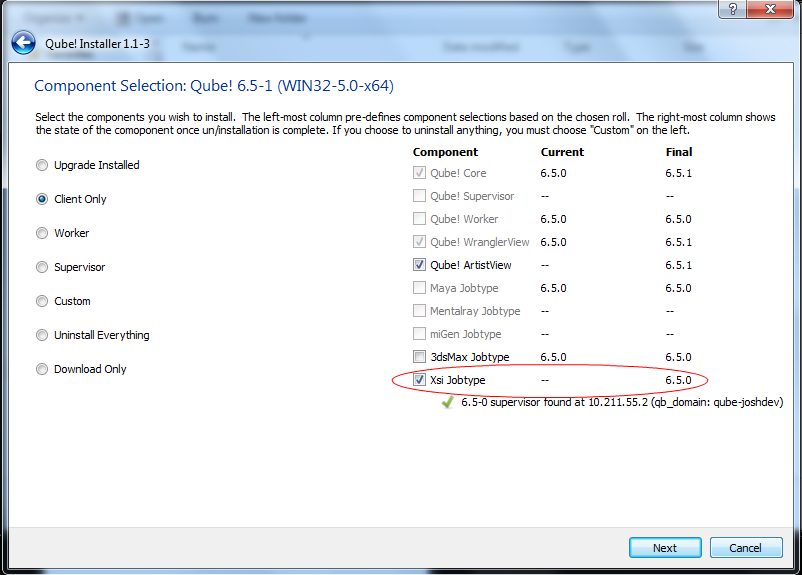
    Alternatively:

    If you only wish to use the "Batch XSI jobs" you can install the InApp plugins via the Qube! WranglerView.
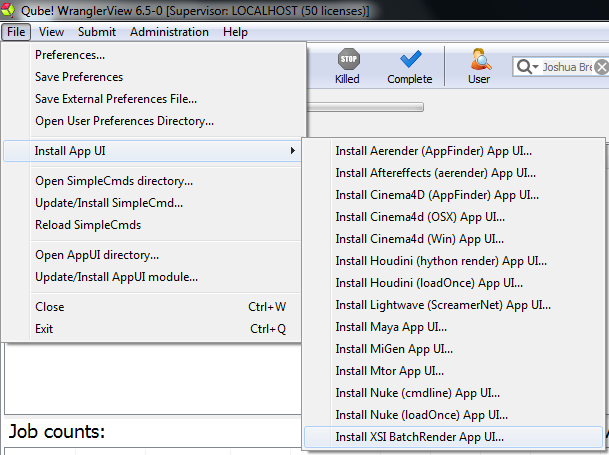
    File > Install App UI > Install XSI BatchRender App UI


    Step 2

    Once installed you should be able to locate the "Qube!" menu in XSI

    InApp Location: 

    Screenshot needed

    File menu > Qube! 


    Step 3

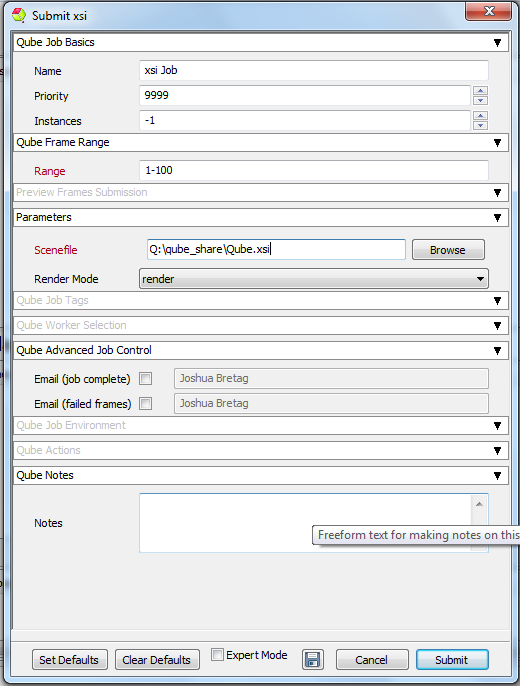
    With a scene loaded in Maya choose "Submit Render Job..." or "Submit Batch Render..." depending on your requirements

    This will present a pre filled submission UI
     

    Step 4

    Ensure sections marked in red have the correct details

    Click submit

    For further details on the submission UI look in the right panel


    Troubleshooting

    If you find you are getting errors here are some useful links for troubleshooting

    Troubleshooting Flowcharts 


    Below Is an expandable view of the "XSI Job..." Jobtype Submission UI

    Icon

    Not all sections need to be filled in in order to render only the fields marked in red are required


    Please click on the text below the section of interest


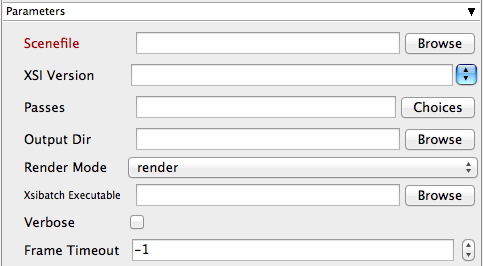
     Parameters

    Scenefile

    Tooltip - Path to XSI scene (required)

    Icon

    Browse or enter manually the location of the scene file to be rendered. This is a required field for submission

    Important: Best practise is to ensure the scene file and all of its dependant files such as textures are on network storage accessible by the workers.

    XSI Version

    Tooltip - Select or enter Softimage/XSI version (select version, or type it in)

    Icon

    Use the drop down or enter manually the required version of XSI

    Passes

    Tooltip - Specify the explicit passes to render (comma-separated list)

    Icon

    Choose or list comma seperated passes to render. These are named in your XSI scene

    Output Dir

    Tooltip - Output directory for images

    Icon

    Browse or manually enter the location of the output directory.

    Important: Best practise is to ensure outputs are written to network storage accessible by the workers

    Render Mode

    Tooltip - Mode for rendering (default="render")

    Icon

    Choose the mode from the drop down box to override scene defaults

    Xsibatch Executable

    Tooltip - Explicit path to xsibatch executable (optional)

    Icon

    Browse or enter manually the location of XSI executable on the workers

    Important : Always double check the location of the workers executable. Be aware that if you are submitting cross platform the path will be different.

    Verbose

    Tooltip - Set verbose mode

    Icon

    Choose the level of detail you would like the logs to provide

    Frame Timeout

    Tooltip - Kill subjobs if a frame runs longer than this value (in seconds)

    Icon

    Enter the numeric value in seconds to set a frame render timeout.


    • No labels