Versions Compared

    Key

    • This line was added.
    • This line was removed.
    • Formatting was changed.

    ...

    Panel
    titleStep 2 (First Time Only)
    Section
    Column
    width60

    Once installed there are a few things that need to be done before using the script.

    Run After Effects and open the General Preferences. :

    • Mac: After Effects > Preferences > General...
    • PC: File > Preferences >General...
    Column
    width40


    Section
    Column
    width60

    Tick "Allow Scripts to Write Files and Access Network"
    Column
    width40

    Panel
    titleStep 3
    Section
    Column
    width60

    With a scene loaded in After Effects, select "Add to Render Queue" from the "Composition" Menu. 

    Set up the Render Queue with the parameters and settings that you want for the project.

    Save the scene file so that the render queue is in it when the file is picked up on a Worker.

    Column
    width40

    This is the Render Queue area


    Section
    Column
    width60

    Now select "QubeAppFinder_Submit_RenderQueue.jsx" from the "File -> Scripts" menu.

    Column
    width40


    Section
    Column
    width60

     If this is the first time you have done this, you will be presented with a dialog box that wants to know where to find the Wrangler View executable.

     Fill Fill this out appropriately:

    • Mac: /Applications/pfx/qube/qube.app
    • PC: C:\Program Files (x86)\pfx\qube\bin\qube.exe
    Column
    width40


    Section
    Column
    width60

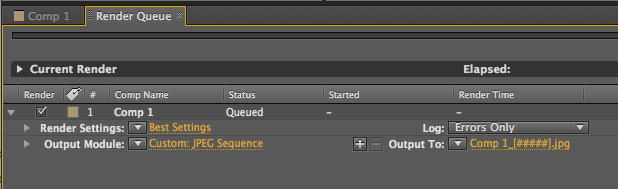
    This will present a pre filled submission UI.

    Ensure sections marked in red have the correct details.

    Stuff that should be set:

    Execution:
    Tip
    titleUseful Settings

    While not strictly required, the following settings are useful for getting a better result. You will need to turn on "Expert Mode" (check box at the bottom of the submission UI) in order to get access to them.

    • In "Execution" choose "Chunks with n frames
    ,
    • ". This is because loading the
    app takes way longer than generating a frame

    Retry Frame Instance: 3 or 5

    Retry Work Delay: 5 or 10 seconds

    Make sure CS version (or CC thing) is correct
    • After Effects application and file typically takes much longer than the time to generate a frame, so it is more efficient to generate several from one After Effects session.
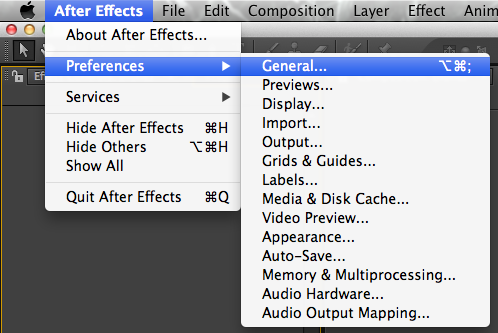
    • Make sure the CS version (or Creative Cloud version, if used) is set to the correct version of After Effects.
    • By default, Qube! will not retry failed frames. So set the "Retry frame/instance" value to 3 or 5, to get 3 or 5 retries before it gives up. Related to that, the default wait between retries is zero seconds, which is typically not useful. Set the "Retry Work Delay" to a value like 5 or 10 to allow machines time to recover from temporary problems such as network errors.


    Column
    width40

    Panel
    titleStep 4
    Section
    Column
    width60

    Click 'Submit'

    For further details on the submission UI see below.

    Column
    width40

    ...