...
| Panel |
|---|
| title | Step 1 (First Time Only) |
|---|
|
| Section |
|---|
| Column |
|---|
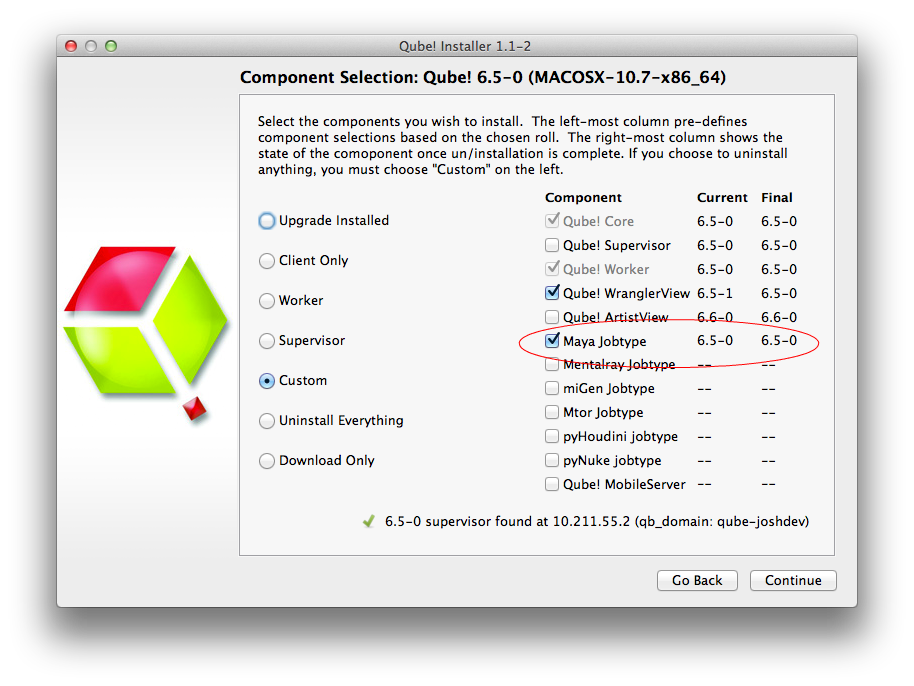
| You will need to have installed the Maya jobtype. If you see a Qube! menu item in the top menu bar, the jobtype is already installed, and you can move to Step 2. Installation:
If you are not familiar with the installation process please refer to the Quickstart section on installing workers, or to Installing Jobtypes. <if this doesn't exist, it should> You will need to select "Maya Jobtype" during the installation process. |
| Column |
|---|
| 
|
|
| Section |
|---|
| Column |
|---|
| Alternatively: If you only wish to use the "batch maya jobs" you can install the InApp plugins via the Qube! WranglerView. File > Install App UI > Install Maya App UI |
| Column |
|---|
|  |
|
|
| Panel |
|---|
|
| Section |
|---|
| Column |
|---|
| Once installed you should be able to locate the "Qube!" menu in Maya's menu bar. InApp Location: |
|
 Image Removed Image Removed
| Column |
|---|
| Image Added |
|
|
| Panel |
|---|
|
With a scene loaded in Maya choose "Submit Render Job..." or "Submit Batch Render..." depending on your requirements This will present a pre filled submission UI 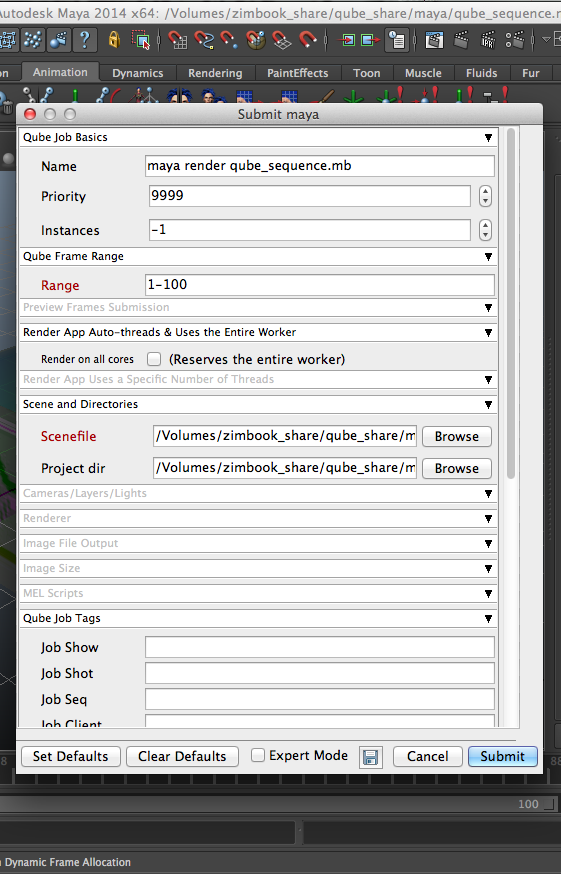
|
| Panel |
|---|
|
Ensure sections marked in red have the correct details Click submit 
For further details on the submission UI look in the right panelsee the information below. |
| Panel |
|---|
|
If you find you are getting errors here are some useful links for troubleshooting Troubleshooting Flowcharts
|
...
| Note |
|---|
Not all sections need to be filled in in order to render only the fields marked in red are required |
Please click on the text below the section of interest

| Excerpt Include |
|---|
| _SimpleCMD_QubeJobBasics |
|---|
| nopanel | true |
|---|
| _SimpleCMD_QubeJobBasics |
|---|
|
...